Note your Mail Server Information (we will have sent this to you) including your full email address (which is also your mail server username); your incoming mail server and your password.
Take a note of your ISP (Internet Service Provider) ie. the ones who you pay to send/receive data to the internet. This is necessary for your outgoing mail server. For more info on outgoing mail click here.
Step 1. Start Mac Mail
Step 2. Go to Preferences, click on Accounts tab, click the + sign to add a new account.

Step 3. Click ‘Other Mail Account’ and continue…

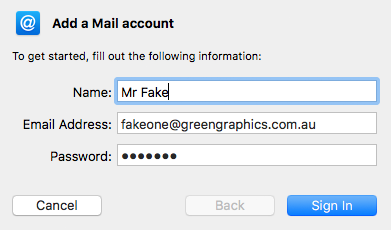
Step 4. Use whatever name you want to be displayed to others and type in the new email address & password.

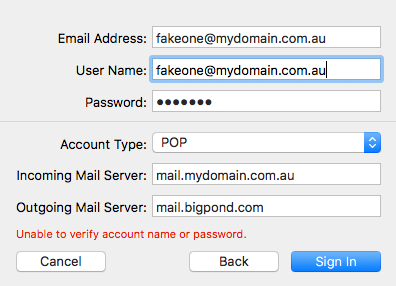
Step 5. Click ‘Sign In’ and wait for it. Uh oh, Apple is trying to think too hard for you and will get this step wrong, telling you it’s ‘unable to verify account name or password’.
![]()
Step 6. Change IMAP to POP.

Step 7. Enter details as above (username is your full email address, including stuff after the @). Enter your incoming mail server and your outgoing mail server (using your ISP’s details) and click ‘Sign In‘.

Finished! Congratulations, you’re done.
Always send a test message (to us or someone else) and get them to send back a message to you. Don’t feel confident until you’ve done this!
IMPORTANT. One last step. We don’t provide backups or archiving of your messages. You need to manage this at your end. We also have a hard limit of 250Mb per user at any one time. So, to ensure your server box doesn’t fill up, make sure you tick the box that says ‘Remove copy from server’ under ‘Account Information’. (Get to this by going back to Preferences/Accounts and clicking on the right one).
![]()
Set it for ‘immediately’ or ‘after one day’ unless you have a good reason to keep messages there for longer.

Call us to troubleshoot this any time but remember we are not IT consultants, we’re your web providers who also handle your incoming mail. If you need any advanced setup we strongly urge you to see an IT specialist, who may well recommend Google’s G-Suite and Office365 as advanced cloud email systems.
